Where I live there is an annual vehicle safety inspection. On this go around the mechanic said he would pass my wife's 2002 Accord this time but the headlight covers would have to be replaced because they were so yellowed and cloudy they were blocking enough light to become unsafe. It was going to be pretty expensive for new headlight covers so I figured I would try one of the headlight restoration kits. The local auto parts store carried a few different types but I settled on Mothers on sale for less than $20. The kit comes with 2 small sandpaper pads that are different on each side and numbered 1 to 4, a bottle of polishing cream (PowerPlastic® Polish), a Powerball polishing pad to use with the cream, and a microfiber towel. Other items you will need are a drill, some tape (blue painting tape is easiest to use), a small pan with some water in it, and some paper towels.

For headlights as bad as mine you use the 4 small sandpaper pads first. However before you begin mask the headlights with the tape so you don't scratch the metal around them as you sand and polish the headlights. Use the pad side #4 first, dunk it in the water for a few seconds, and sand down the lights for a few minutes, occasionally dunking in the water. You will see the yellowing start to come off and you might be able to notice the headlights get a bit clearer. Do the same with each numbered pad until you get to the #1 pad. By this time if you have sanded enough all the yellowing will be gone and the headlight clouding will be mostly gone. Wipe the water from the headlights and the drips that have occurred. For the final polishing attach the Powerball to your drill, shake up the bottle of PowerPlastic® Polish, squeeze a nickel sized amount onto the Powerball and, starting the drill at a slow speed and gradually speed it up polishing the plastic until smooth and all cloudiness is gone. It will take a few times and if you aren't getting the correct final appearance you probably didn't sand with the pads long enough. Try again maybe using just the 2 and 1 pads and then use the Powerball again. At this point use the microfiber towel to wipe off any residue.

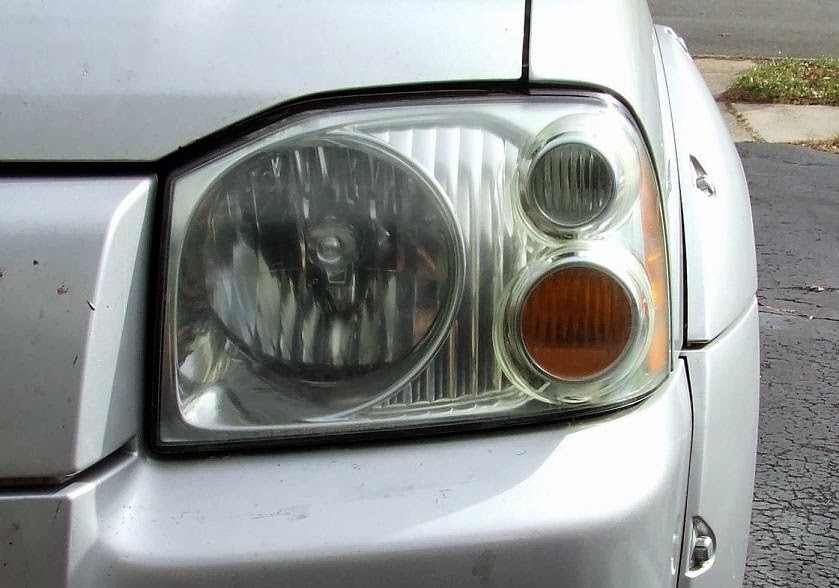
Unfortunately I forgot to take pictures of the car before I started so I also did my 2005 Frontier to show an example of the results. The car was much worse but the end result was about the same, actually a little better on the car. I think I didn't use the #1 pad quite long enough.
For headlights as bad as mine you use the 4 small sandpaper pads first. However before you begin mask the headlights with the tape so you don't scratch the metal around them as you sand and polish the headlights. Use the pad side #4 first, dunk it in the water for a few seconds, and sand down the lights for a few minutes, occasionally dunking in the water. You will see the yellowing start to come off and you might be able to notice the headlights get a bit clearer. Do the same with each numbered pad until you get to the #1 pad. By this time if you have sanded enough all the yellowing will be gone and the headlight clouding will be mostly gone. Wipe the water from the headlights and the drips that have occurred. For the final polishing attach the Powerball to your drill, shake up the bottle of PowerPlastic® Polish, squeeze a nickel sized amount onto the Powerball and, starting the drill at a slow speed and gradually speed it up polishing the plastic until smooth and all cloudiness is gone. It will take a few times and if you aren't getting the correct final appearance you probably didn't sand with the pads long enough. Try again maybe using just the 2 and 1 pads and then use the Powerball again. At this point use the microfiber towel to wipe off any residue.
Unfortunately I forgot to take pictures of the car before I started so I also did my 2005 Frontier to show an example of the results. The car was much worse but the end result was about the same, actually a little better on the car. I think I didn't use the #1 pad quite long enough.
Comments
Post a Comment